Quilt Binding Tutorial
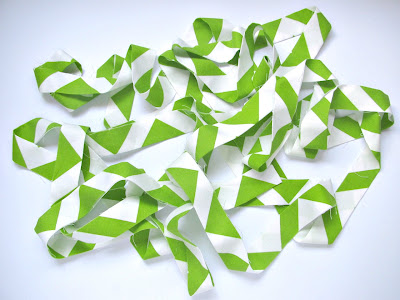
Here is a quick and easy quilt binding tutorial to help you make your own binding in the fabric of your choice. It makes the whole process super simple and you will have beautiful sharp, square corners when you are done.
1. For the length of binding needed, measure and add up all four sides of the completed quilt and add 25 inches to the total.
2. Cut long strips of fabric, 2.5” in width. Cut enough strips to sew together to equal the total length calculated above. If you prefer a narrower binding, cut the strips 2 1/4” in width. If you prefer a scrappy look, cut the strips out of different fabrics and the length of the strips is entirely up to you.
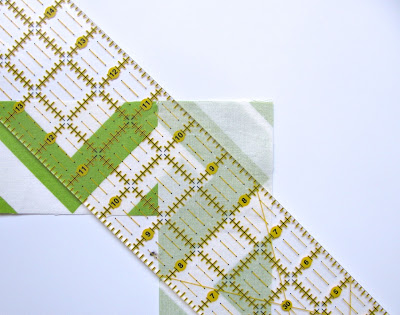
3. Attach the strips of fabric as shown in the picture below. Stitch from corner to corner as shown by the black line in the picture.
4. Use a ruler to trim to ¼” seam allowance.
The chain piecing technique can be used when sewing the strips together.
5. Once the strips are sewn together and the seam allowances are trimmed, press the seams open. Then fold the strip in half and press, as demonstrated in the photo below.
6. Now the binding is ready to sew to the quilt. Line up the binding along the edge of the quilt with the raw edges of the binding lined up with the edge of the quilt, preferably somewhere on the lower part of the quilt.
Leave about 10” of extra binding loose at the beginning to aid in sewing up the edges at the end. Start sewing 10” from the beginning of the binding demonstrated by the black arrow in the picture below.
7. Start sewing the binding to the quilt with ¼” seam allowance. Backstitch or lockstitch at the beginning. When you reach the corner, stop ¼” away from the end and backstitch to lock in the stitch.
Remove the quilt from the machine and fold the additional binding straight up as demonstrated in the picture below.
Hold the corner in place and then fold the binding back down. Hold or pin in place and start sewing from the end.
Continue this process all the way around the quilt. Stop stitching with the last 10” of binding loose. Backstitch or lockstitch at the end.
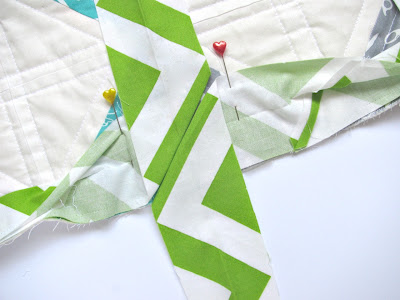
8. Unfold the binding flat and pin to keep it flat. Then line up the edges on the diagonal as shown below.
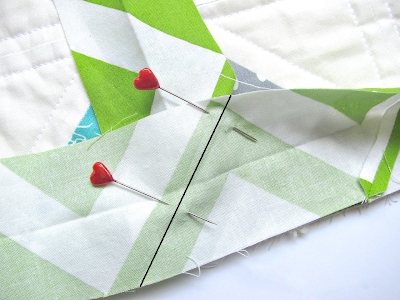
9. Unfold one strip over the other and pin the two strips together along the diagonal fold. This is where the two strips will be sewn together. It might help to use a marking tool to mark the stitch line. This is an easy way to accurately pin on the diagonal.
The picture below shows the two ends of the binding pulled away from the quilt edge and pinned on the diagonal.
Sew along the black line.
11. Fold the binding back in place to test if the sizing is accurate. Do this before cutting anything. Once it is determined that the length is correct, open the binding and trim the seam allowance to ¼”. Press the seams open with an iron, a pressing tool or your finger. Fold the binding back into place along the quilt and finish sewing it to the quilt.
12. Fold the binding over and whipstitch the binding to the quilt back.
If you would like to see more of the quilt in these pictures, it can be found at the following post: Rainbow Steps and Stairs


11 Comments
Amberly @ Bingo Buttercup Art
Very inspiring for a way super beginner like myself. I am very much so still learning about all things related to my sewing machine. I need all the great tutorials I can manage on quilting!
-Amberly!
deebriese
Wow great tutorial..Im at this step on my quilt..Thanks
Sil
Great tutorial! Thanks!
Kelly
Great tute – thanks! 🙂
Tessa @ TheSewingChick
Great job on the tutorial, Candace. It's fun to see the different ways people do things!
Alexis Tanner Lane
This is so good to know! I've always wondered how to do it. Thanks for the tutorial!
Trish - Mom On Timeout
You make this look so easy – great tutorial! Thanks so much for sharing at Mom On Timeout!
Jereena
Thank you for such an easy binding tutorial. I got it right the first time I tried the method you show on how to attach the ends of the binding. Thanks for sharing.
Saltwater Quilts
That's great! I am glad that it worked well for you. My goal was to make it a quick, easy process. No throwing the quilt across the room in frustration. 🙂
Quilt Doodle Designs
Wonderful tutorial! Thank you 🙂
Karen
Thank you for the binding tutorial! I have pinned this for when I have the nerve to try quilting.